

Table of Contents[Hide][Show]
- Why a snack station beats a snack free-for-all
- Pick your spot (and yes, this works with no pantry)
- The frugal move: buy in bulk and portion it yourself
- Sort everything into bins by type
- Solving the chip situation
- Go clear so you can see what’s left
- Set up two zones: grab-and-go and backstock
- Don’t forget a fridge snack station
- Build a lunch-packing lane while you’re at it
- Homemade snacks that stretch the budget even further
- Label it and set the ground rules
- The 10-minute weekly reset
- Snacks handled, before the first bell rings
- Frequently Asked Questions
You know the moment. It’s the second week of school, the pantry door is hanging open, and there’s a trail of granola bar wrappers leading from the kitchen to the couch. Somebody’s crying because the “good” snacks are gone, somebody else swears they didn’t touch them, and you’re standing there realizing you bought that whole box four days ago.
Every August it’s the same story. Back-to-school season turns a perfectly tidy pantry into a snack tornado, and honestly, most of the frugal blogs out there will tell you to organize your pantry but never say a word about the one shelf that actually causes the chaos — the snacks.
So let’s fix that. This is a real, budget-minded snack station setup: pantry snack organization that survives back-to-school, keeps your grocery bill from ballooning on individually-wrapped everything, and — best part — lets the kids help themselves without dismantling the whole shelf.
Why a snack station beats a snack free-for-all
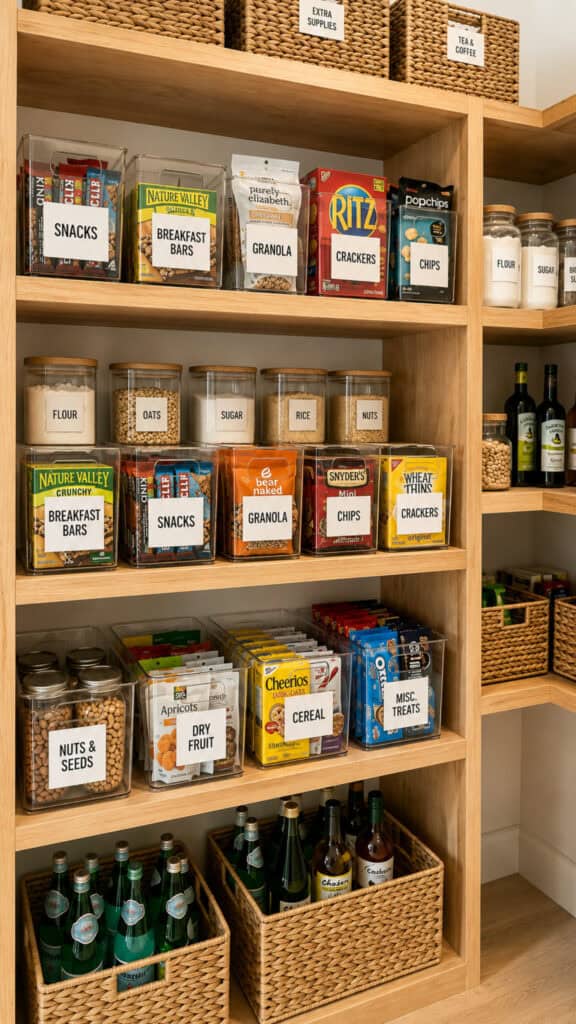
A snack station is just a dedicated, organized spot where all the snacks live — sorted, portioned, and visible. It sounds simple, but it fixes three problems at once.
It stops the raid, because kids grab what’s in the bin instead of tearing through everything. It saves you money, because you can portion bulk snacks yourself instead of paying a premium for single-serve packs.
And it saves your sanity on busy mornings, because the grab-and-go zone means nobody’s asking you where the fruit snacks are while you’re packing lunches. One little setup, three wins.
Pick your spot (and yes, this works with no pantry)
Your snack station needs to be low and reachable — right at kid height. The whole point is that they serve themselves, so if they need a step stool and your help, you’ve just made more work for yourself, not less.
A bottom shelf, a low cabinet, one drawer, or the bottom tier of a rolling cart all work beautifully. If your kitchen doesn’t have a pantry at all, don’t let that stop you — I wrote a whole post on small pantry organization ideas for kitchens with no pantry, and every one of those pantry-zone tricks (the rolling cart, the thrifted bookshelf, the over-the-door organizer) makes a perfect snack station too. You don’t need a pantry. You need one reachable spot.
The frugal move: buy in bulk and portion it yourself
Here’s where the money hides. Those little individual snack packs are wildly overpriced — you’re paying a premium for the packaging, not the food. The frugal fix is to buy the big bag and portion it yourself.
if you do want to grab the multipack snacks I’ve found the best deal on those are at wholesale clubs. BJ’s is actually running a whole year membership for only $14 here.
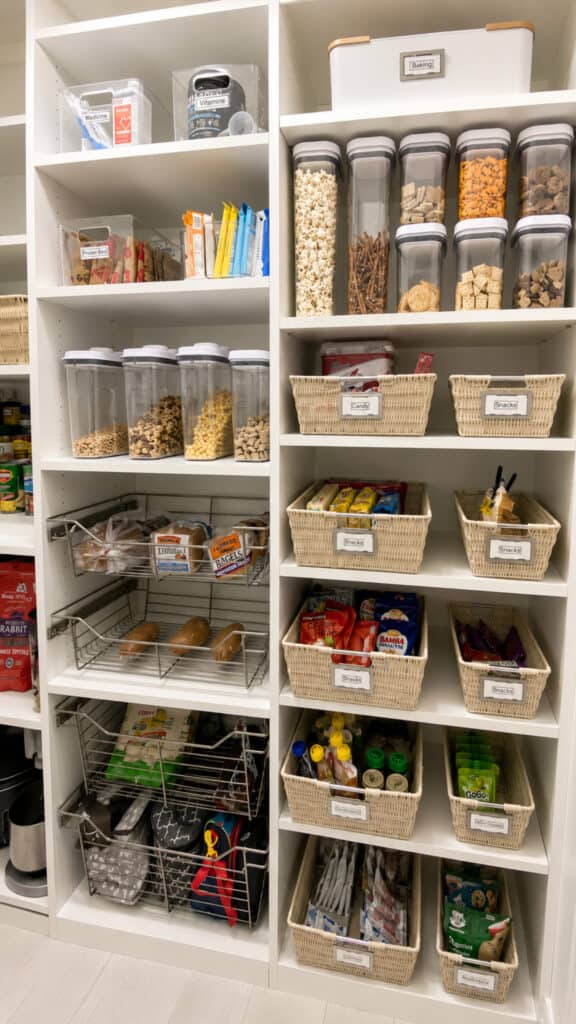
Grab a box of reusable snack bags or a set of small containers, and spend ten minutes on the weekend divvying up the big bag of pretzels, crackers, or trail mix into grab-and-go portions. Toss them all in a bin, and now your kids have “single-serve” snacks at a fraction of the cost.
This one habit alone can shave a real chunk off your back-to-school grocery bill, and it’s the reason a homemade snack station beats the pre-packaged version every single time.
Sort everything into bins by type
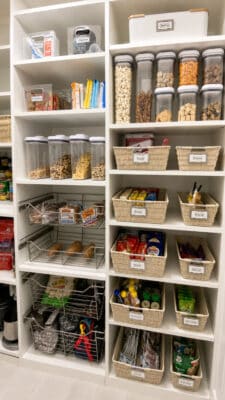
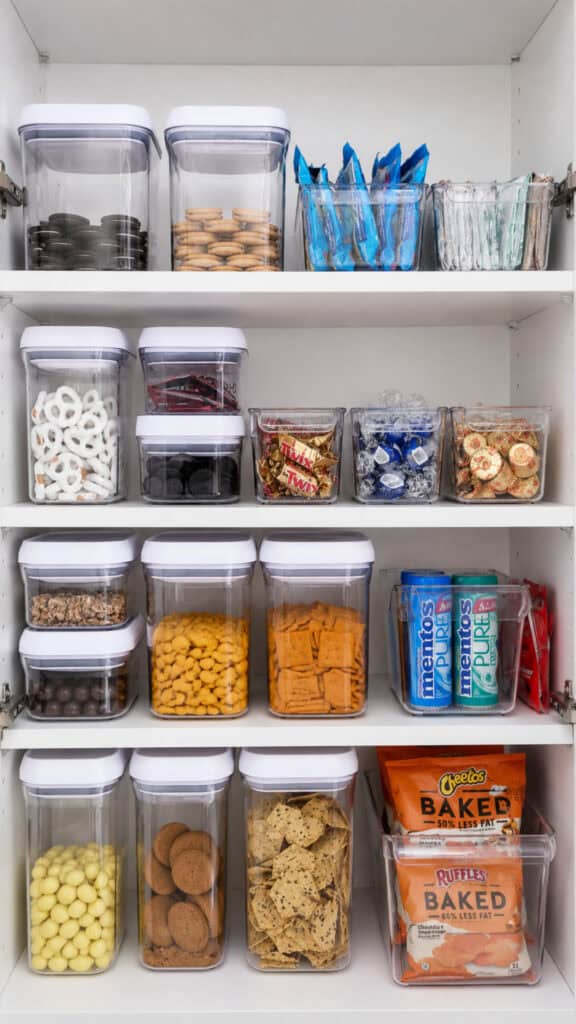
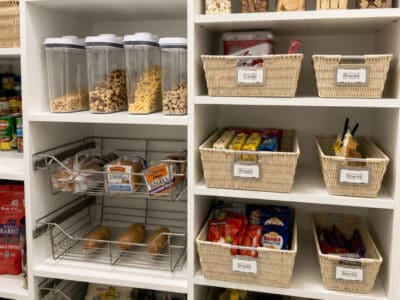
Don’t just pile snacks on a shelf — sort them into open bins by category. When everything has a home, everything gets put back in that home, and “cleaning up” stops being a whole project.
Keep it simple: a bin for salty (pretzels, crackers, popcorn), a bin for sweet (granola bars, fruit snacks), a bin for the portioned bulk stuff, and maybe a bin for on-the-go pouches. Open bins beat lidded ones for a snack station, because a kid will actually drop a wrapper in an open bin — a lid is just one more step between them and the couch.
Solving the chip situation
Chips deserve their own paragraph, because bags of chips are the natural enemy of an organized pantry. They’re bulky, they tip over, they get crushed, and half-open bags go stale in the back.
Two fixes. First, chip clips — a handful of good clips means no more stale, spilled bags, and it’s the cheapest upgrade on this whole list. Second, stand your bags upright in a tall bin or a dedicated basket instead of stacking them flat, so nobody has to excavate to reach the bottom bag.
If your crew goes through a lot of chips, give them one clear upright bin of their own — good chip organization in the pantry is honestly half the battle of keeping the whole shelf from collapsing.
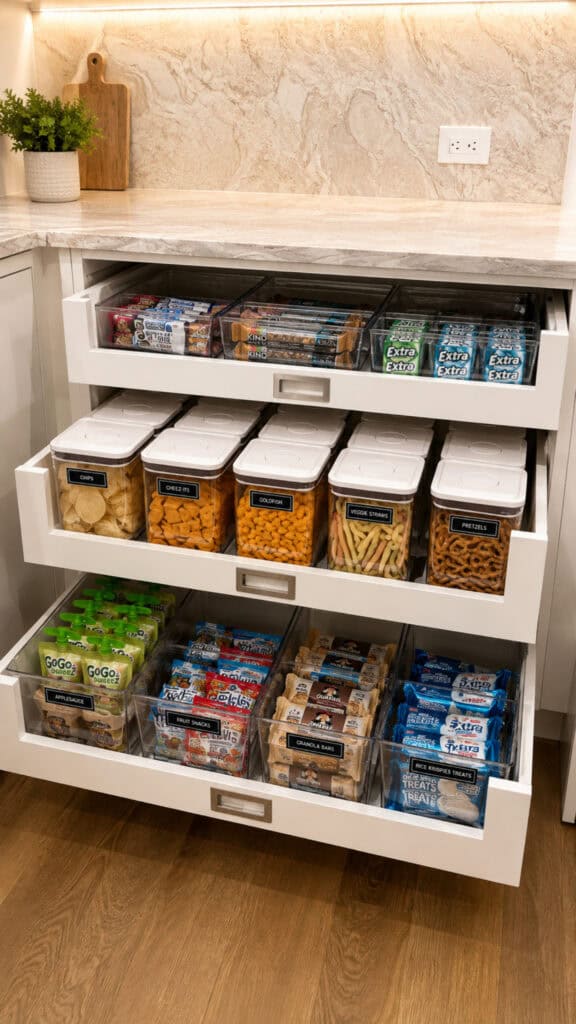
Go clear so you can see what’s left
Clear bins and containers aren’t just prettier — they’re practical. When you can see straight through to what’s inside, you know at a glance when the crackers are running low and you avoid the classic mistake of buying a third box of something you already had two of.
This is also your inventory system. A quick glance at the snack station on your way out the door tells you exactly what’s on the grocery list. No digging, no surprises, no doubling up.
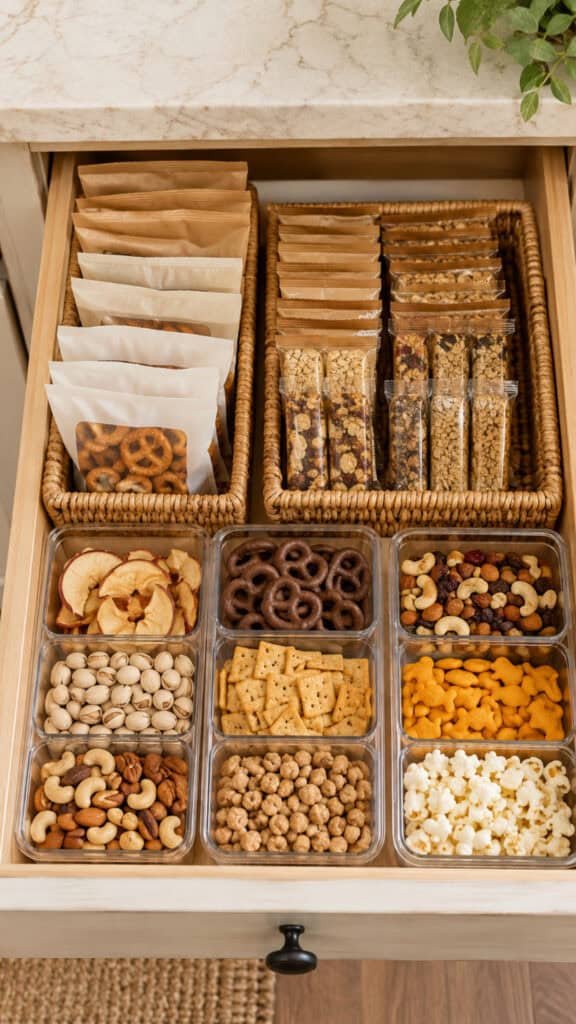
Set up two zones: grab-and-go and backstock
This is the trick that actually makes a snack station survive back-to-school. You run two zones, not one.
The grab-and-go zone sits down low at kid height, and it’s fair game — whatever’s in it, they can have. The backstock zone lives up high, out of reach, and that’s where the extras and the bulk buys wait their turn.
When the grab-and-go bin empties out, you refill it from backstock. Suddenly the kids aren’t burning through a whole week of snacks in two days, because they only ever see one portion’s worth at a time. You control the flow without policing every single request.
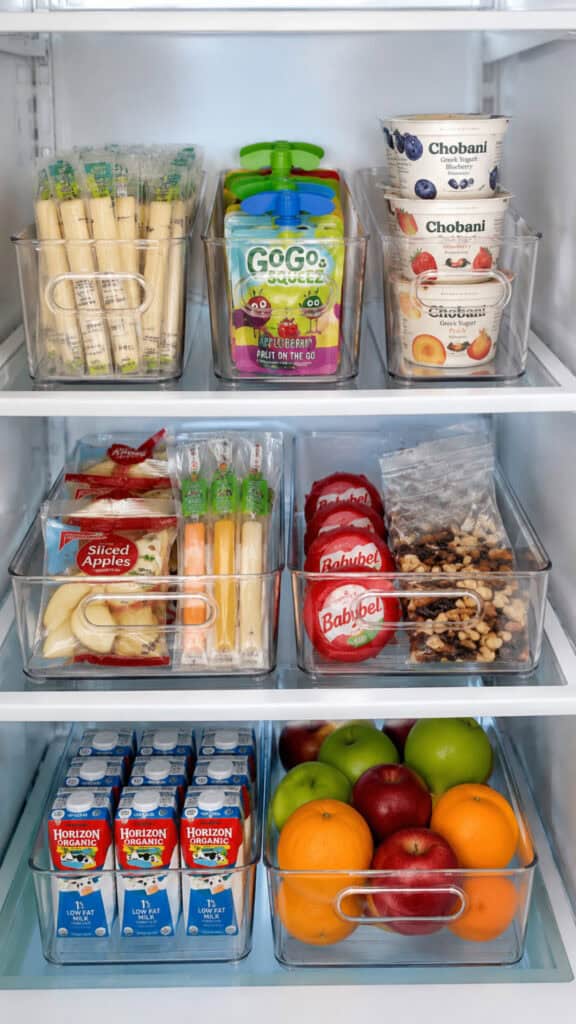
Don’t forget a fridge snack station
Not every snack lives in the pantry, so give the fridge a grab-and-go zone too. A low bin on a bottom shelf, stocked with cheese sticks, yogurt, cut fruit, and veggie cups, turns the healthier options into the easy options.
Little psychology trick: kids grab what they see first and reach for the easiest. Put the fruit and cheese at eye level in a clear bin, and you’ll be amazed how often that’s what gets grabbed — no nagging required.
Build a lunch-packing lane while you’re at it
Since you’re in there anyway, set up a little lunch-packing lane right next to the snack station. Keep the lunchbox-sized portions, the reusable containers, and the “lunch only” snacks together in one spot.
On a rushed morning, packing a lunch turns into grab-two-from-this-bin-and-go. Better yet, this is the zone where you let the kids pack their own — everything they’re allowed is right there, portioned and ready, so they can build a lunch without building a mess.
Homemade snacks that stretch the budget even further
Now here’s where a from-scratch kitchen really pulls ahead. The most frugal snack station in the world leans on a few homemade staples, and they’re easier than you’d think.
A big batch of homemade granola bars, a jar of trail mix mixed from bulk bins, a bag of popped-on-the-stove popcorn, or a dozen muffins made on Sunday will all cost pennies compared to the boxed versions — and they portion right into your grab-and-go bags.
Bake or mix once a week, stock the station, and you’ve got snacks that are cheaper and better than anything wrapped in plastic. This is exactly the kind of thing frugal families used to do as a matter of course, and it still works.
Label it and set the ground rules
Two quick things make the whole system hold up. Label the bins — even just tape and a marker — so everyone knows where things go and where things live. And set one simple ground rule so back-to-school snacking doesn’t blow through your grocery budget by Wednesday.
My favorite rule is dead simple: the grab-and-go bin is what’s available, and when it’s empty for the day, it’s empty. It teaches the kids to pace themselves, it stops the four-days-and-it’s-gone problem, and it means you’re not refereeing the pantry every afternoon. Set the expectation once, and the station does the enforcing for you.
The 10-minute weekly reset
A snack station isn’t a one-and-done project — it’s a little rhythm. Once a week, ideally on grocery day, spend ten minutes resetting it: refill the grab-and-go bins from backstock, portion out the new bulk buys, toss anything stale, and glance at what’s low so it lands on next week’s list.
Ten minutes. That’s the whole maintenance cost of never having a snack tornado again.
Snacks handled, before the first bell rings
A snack station won’t make the school mornings any earlier, but it will take one whole category of chaos off your plate. Sorted bins, portioned bulk buys, a grab-and-go zone the kids can actually reach, and a backstock they can’t — that’s a system that survives right through the school year.
Set it up before the back-to-school rush hits, pick a couple of homemade snacks to rotate in, and you’ll spend the fall reaching for the coffee instead of refereeing the pantry.
Make snack planning part of the whole week.
The snack station runs smoothest when it’s tied to a real plan — knowing what to buy in bulk, what to make ahead, and what’s going in the lunchboxes. My Meal Planner gives you a simple weekly layout for meals, lunches, and snacks, so you shop once, prep once, and stop the mid-week grocery runs. It’s the easiest way to keep your organized pantry actually working. [Grab the Meal Planner here →]
(And if your kitchen has no pantry to build this in, start with my post on small pantry organization ideas for kitchens with no pantry — then come back and stock your station.)
Frequently Asked Questions
How do you organize snacks in a pantry? Sort them into open bins by category — salty, sweet, portioned bulk, and pouches — and keep everything at a reachable height so kids can serve themselves. Use clear containers so you can see what’s running low, and run a grab-and-go zone down low with backstock up high.
How do I organize chips in my pantry? Use chip clips to keep opened bags fresh, and stand the bags upright in a tall bin or basket instead of stacking them flat. Give chips their own clear bin so they don’t crush the rest of the shelf, and keep the bulk backstock separate from the open bags.
How do you set up a snack station for back-to-school? Pick a low, reachable spot, sort snacks into labeled bins by type, and portion bulk buys into reusable bags yourself to save money. Run two zones — grab-and-go at kid height and backstock up high — and reset it in ten minutes once a week.
How do you keep kids from eating all the snacks at once? Only put out one portion’s worth in the grab-and-go bin and keep the rest as backstock up high, out of sight. Set a simple rule that the bin is what’s available for the day, and refill it on your own schedule so a week of snacks doesn’t vanish in two days.
 How to Keep Chickens Warm in Winter: 12 Ways That Actually Work
Leave a Reply