


Table of Contents[Hide][Show]
- What You Need to Make Salt Dough Ornaments
- The Best Salt Dough Recipe for Ornaments
- How to Make Salt Dough Ornaments Step by Step
- How to Bake Salt Dough Ornaments So They Don’t Puff Up
- Air Dry vs Oven Bake vs Microwave
- How to Paint and Decorate Salt Dough Ornaments
- How to Seal Salt Dough Ornaments So They Last for Years
- Salt Dough Handprint Ornaments
- Cinnamon Salt Dough Ornaments
- Salt Dough Christmas Ornament Ideas
- Salt Dough Ornaments for Kids
- Troubleshooting Salt Dough Ornaments
- Make a Batch This Weekend
Salt dough ornaments might be the most frugal Christmas craft there is. You need three things from your pantry: flour, salt and water. One batch makes about two dozen ornaments for roughly a dollar.
They’re also the ornaments that end up meaning the most. A lopsided star from a seven-year-old, a tiny handprint from a baby’s first Christmas, a stamped snowflake you made on a snowy Saturday. Store-bought ornaments can’t compete with that.
This is one of our favorite traditions when the girls were little.
The problem? A lot of salt dough recipes leave you with puffy, cracked or soft ornaments. Below is the recipe I trust, plus exactly how to bake them flat, how to paint and seal them so they last for years, and fun versions like handprint and cinnamon salt dough ornaments.
If you’re decorating on a budget this year, don’t miss my full list of cheap DIY Christmas decorations too.

What You Need to Make Salt Dough Ornaments
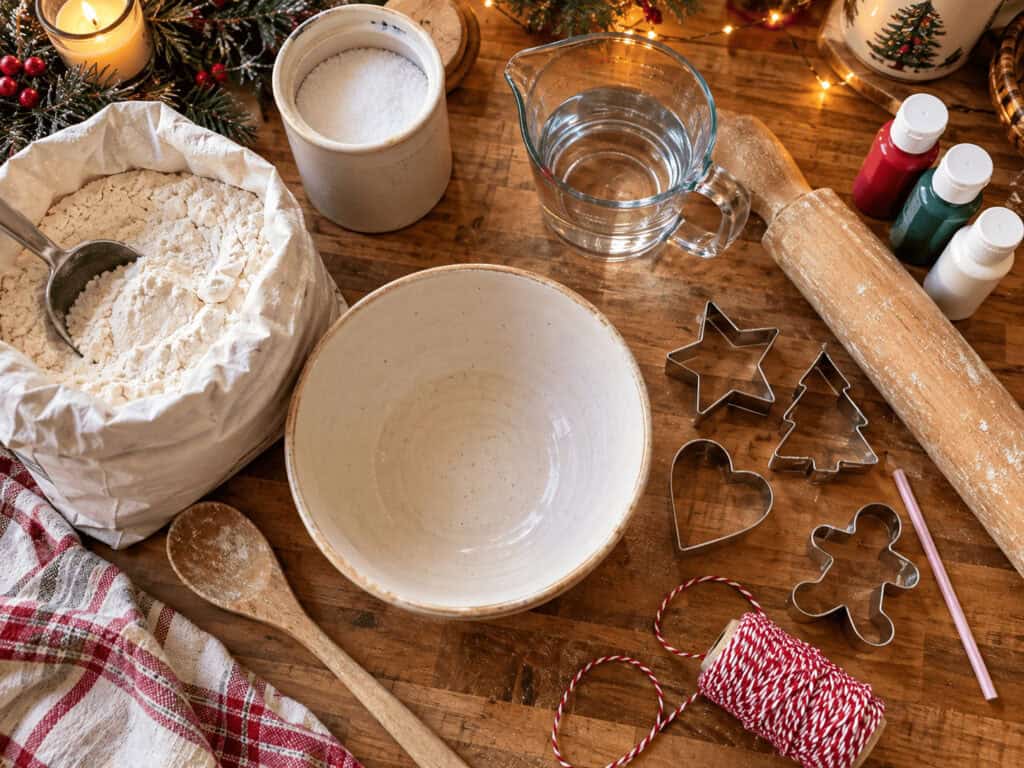
You probably have everything already. That’s what makes DIY salt dough ornaments such a good frugal craft.
Ingredients:
- 2 cups all-purpose flour
- 1 cup table salt (fine salt works best; coarse salt makes a bumpy surface)
- 3/4 to 1 cup warm water
Tools:
- Mixing bowl and wooden spoon
- Rolling pin
- Christmas cookie cutters
- A straw or skewer for the hanging hole
- Baking sheet and parchment paper
- Acrylic craft paint and small brushes
- Clear sealer (Mod Podge or a clear acrylic spray)
- Ribbon, twine or baker’s twine for hanging
The whole batch costs around a dollar in flour and salt. Even with paint and twine, you’re looking at pennies per ornament.
The Best Salt Dough Recipe for Ornaments
The ratio is the secret: 2 parts flour to 1 part salt, with just enough water to bring it together. Too much water is the number one reason ornaments puff, crack or never fully dry.
- Whisk the flour and salt together in a large bowl.
- Add 3/4 cup warm water and stir with a wooden spoon.
- Add more water one tablespoon at a time until a dough forms. It should feel like play dough, not sticky.
- Turn it out onto the counter and knead for 5 to 10 minutes until smooth and stretchy.
- If it’s sticky, knead in a little flour. If it’s crumbly, add a few drops of water.
Warm water helps the salt dissolve, which gives you a smoother surface for painting. This recipe makes about 24 medium ornaments, depending on your cutters.
Can’t use it all today? Wrap the dough tightly in plastic and refrigerate it for a day or two. Let it come back to room temperature and knead it again before rolling.

How to Make Salt Dough Ornaments Step by Step
Once your dough is ready, the fun part goes fast.
- Roll it out on a lightly floured counter to about 1/4 inch thick. Thinner ornaments dry faster and puff less. Thicker ones crack less but take much longer to dry.
- Cut your shapes with cookie cutters and lift them onto a parchment-lined baking sheet.
- Smooth the edges with a damp fingertip so they don’t crack later.
- Make the hanging hole with a straw near the top. Make it a little bigger than you think, since it shrinks slightly as it dries.
- Add texture before baking if you want it: press in rubber stamps, lace, a fork, or even a sprig of evergreen for a pretty imprint.
- Reroll the scraps and keep cutting until the dough is gone.
Keep the thickness the same across the whole tray. Mixed thicknesses means some ornaments are done while others are still soft in the middle.

How to Bake Salt Dough Ornaments So They Don’t Puff Up
This is where most salt dough ornaments go wrong. You’re not really baking them. You’re slowly drying them out.
- Use a low oven: 250°F (or 200°F if your oven runs hot).
- Bake 2 to 3 hours for 1/4-inch ornaments. Thicker ones can take longer.
- Flip them halfway through so both sides dry evenly and the backs stay flat.
- Check for doneness: they should be hard all the way through and sound hollow when tapped. Soft spots mean they need more time.
- Let them cool completely on the tray before painting.
Why do salt dough ornaments puff up? The oven is too hot, so the water inside turns to steam faster than it can escape. Air bubbles trapped in the dough make it worse. Knead well, keep the heat low, and prick any bubbles with a toothpick before baking.
A little browning on the bottom is fine. You’ll paint over it.

Air Dry vs Oven Bake vs Microwave
You have three options for drying salt dough ornaments, and each one has trade-offs.
| Method | Time | Best for | Watch out for |
|---|---|---|---|
| Oven bake | 2–3 hours | Most ornaments, fastest reliable result | Puffing if the oven is too hot |
| Air dry | 2–7 days | Handprints and keepsakes you don’t want to risk | Curling edges, flip daily |
| Microwave | Minutes | Not recommended | Burning, bubbling and uneven drying |
Air drying is the gentlest option and costs nothing, but it takes patience. Set the ornaments on a cooling rack in a warm, dry spot and flip them once a day so they stay flat. Humid houses (or a damp farmhouse in a Western New York December) can stretch it to a full week.
I’d skip the microwave. It dries the outside before the inside, and salt dough can scorch and smoke fast.

How to Paint and Decorate Salt Dough Ornaments
Painting is the part kids love most. Lay down newspaper and let everyone pick their colors.
- Acrylic craft paint is the best choice. It’s cheap, covers well and dries fast.
- Paint a base coat of white first if you want bright colors to really pop.
- Use a toothpick or the end of a paintbrush for dots, eyes and tiny details.
- Paint pens make lettering easy, like names and the year on the back.
- Leave some plain. Unpainted salt dough has a creamy, rustic look that fits a farmhouse tree perfectly. Try a simple white star with red twine.

Other easy decorating ideas: brush on glue and sprinkle with glitter, dab on gold paint for a gilded edge, or press in buttons and beads before baking.
Let the paint dry completely, at least a few hours, before you seal.

How to Seal Salt Dough Ornaments So They Last for Years
Don’t skip this step. Salt pulls moisture out of the air, so unsealed ornaments can turn soft, sticky or even moldy in storage.
- Mod Podge (gloss or matte) brushed on in two or three thin coats.
- Clear acrylic spray sealer, sprayed outdoors or in the garage, in several light coats.
- Clear nail polish works in a pinch for tiny ornaments.
Seal the front, back and edges, letting each coat dry before the next. Any bare spot is a place moisture can sneak in.
Store finished ornaments wrapped in tissue paper in an airtight container, somewhere dry. A damp basement or barn is the fastest way to ruin them. Sealed and stored right, salt dough ornaments can last for decades.

Salt Dough Handprint Ornaments
Salt dough handprint ornaments are the ones grandparents fight over. They’re also the perfect first Christmas keepsake for a baby.
- Roll a ball of dough into a circle about 1/2 inch thick, a little bigger than the hand.
- Press the hand down firmly and evenly, then lift straight up. For babies, a footprint is often easier.
- Trim around the print with a knife or use a large round cutter.
- Poke the hanging hole and write the name and year in the dough with a toothpick.
- Air dry or bake low and slow. These are thicker, so expect closer to 3 to 4 hours in the oven, or several days of air drying.
A slightly wetter dough gives you a crisper print. Add an extra tablespoon of water to the handprint portion only.
Paint the print in a contrasting color or leave it natural with gold around the edge. Wrap one in tissue with a tag and it’s a gift that costs about a quarter to make.

Cinnamon Salt Dough Ornaments
Want your tree to smell like Christmas? Cinnamon salt dough ornaments are an easy twist on the basic recipe.
Swap 1/4 cup of the flour for ground cinnamon. You can also add a teaspoon of ground cloves or nutmeg. The dough turns a warm brown color, which looks beautiful and rustic with no paint at all.
Buy the cheapest cinnamon you can find for this. A big bulk container from a warehouse club or the dollar store is perfect, since nobody’s eating it.
The scent is strongest the first year. Gently sand the surface with fine sandpaper next Christmas to bring it back.
Note: this is different from applesauce cinnamon ornaments, which skip the salt and flour entirely.

Salt Dough Christmas Ornament Ideas
Need inspiration? Here are easy salt dough Christmas ornament ideas that look great on a farmhouse tree.
- Reindeer: Use a gingerbread cutter upside down, so the legs become antlers. Paint a red nose.
- Rustic stars: Leave them unpainted, hang with red-and-white baker’s twine.
- Stamped snowflakes: Press a rubber stamp in before baking, then rub white paint into the lines.
- Lace ornaments: Roll a piece of vintage lace into the dough for a delicate pattern.
- Evergreen imprints: Press a sprig of pine or cedar from the yard into the dough.
- Gingerbread men: Paint them brown with white “icing” details.
- Gift tags: Cut rectangles, stamp a name, and tie them onto presents.
- Mini garland: Cut small hearts or stars, poke two holes, and string them on twine with dried orange slices.
Mix two or three styles on one tree for a cozy, collected look.

Salt Dough Ornaments for Kids
Salt dough ornaments for kids are one of the best cheap holiday activities you can do at home. They’re simple enough for preschoolers and fun for older kids too.
A few tips to keep it fun (and less messy):
- Give each child their own small ball of dough and a placemat.
- Let them use plastic cookie cutters, but you handle the oven.
- Have them write their initials and the year on the back before baking.
- Plan it over two days: make and bake on day one, paint on day two.
- Use washable paint for little ones, then seal it yourself once it’s dry.
Important: salt dough is not edible, and the high salt content is dangerous for pets. Keep dough and finished ornaments away from dogs, and hang them high on the tree if you have a curious pup.
Troubleshooting Salt Dough Ornaments
If your ornaments don’t turn out right, it’s almost always one of these problems.
| Problem | Why it happens | Fix |
|---|---|---|
| Puffed up or bubbly | Oven too hot or air trapped in dough | Bake at 200–250°F, knead longer, prick bubbles |
| Cracked | Dough too dry, too thick, or dried too fast | Add a little water, roll to 1/4 inch, lower the heat |
| Soft or bendy after baking | Not fully dried inside | Bake longer and flip halfway |
| Sticky or soft in storage | Moisture pulled in from the air | Seal every side, store in an airtight container |
| Curled edges | Drying unevenly | Flip during baking, or air dry on a rack |
| Grainy surface | Coarse salt | Use fine table salt and warm water |
A cracked ornament can often be saved. Fill the crack with a little fresh dough or white glue, let it dry, then paint over it.

Make a Batch This Weekend
Salt dough ornaments are proof that the best Christmas decorations don’t come from a store. A cup of salt, two cups of flour, an afternoon at the kitchen table, and you’ve got ornaments your family will pull out of the box for years.
Start with one batch of plain stars and a few handprints. Next year, try the cinnamon version. Before long, your tree will tell the story of every Christmas you’ve spent together.
Which shape are you making first? Tell me in the comments, and pin this post so you can find the recipe again next December.
 30 Cheap DIY Christmas Decorations That Look Like a Million Bucks
Leave a Reply