If your fruit bowl is overflowing or your berry bushes are going absolutely wild, this post is for you. Making homemade jam or jelly is one of the most satisfying — and budget-friendly — things you can do with a surplus of fresh fruit. It’s the skill that started my entire preserving journey, and I’ll never look back.
Our first home had wild black raspberries growing everywhere. Like, everywhere. I had no idea what to do with them all until I discovered jam-making, and honestly? It changed how I think about food. There’s something deeply rewarding about turning fruit that costs you nothing into jars of gorgeous, glossy preserves that last all year long.
If you’re new to homesteading or home preservation, jams and jellies are the perfect starting point. The learning curve is gentle, the payoff is huge, and your toast will never be the same again.
🍓 What’s your favorite fruit to preserve?
Jam vs. Jelly: What’s Actually the Difference?
Both jam and jelly start the same way — ripe fruit plus sugar, cooked down with heat. The sugar and heat work together to create a shelf-stable preserve that won’t spoil. But they part ways pretty quickly after that.
Jelly is made from only the juice of the fruit. The pulp, seeds, and skin are strained out, leaving you with a clear, smooth spread. It’s beautiful in the jar and has a delicate, refined flavor.
Jam is made from the whole fruit — pulp, skin, and all. That means jam is chunkier, more rustic, and usually packs a much more intense flavor punch. The skins in particular contain a high concentration of flavor compounds, which is why a blackberry jam can taste almost more blackberry-ish than the actual berries.
Once your fruit is cooked down (and strained, if you’re making jelly), a setting agent is added — typically commercial pectin, though some fruits like apples and citrus have enough natural pectin to set on their own. The hot mixture goes into jars, and then you choose your preservation method.
Which brings us to the fun part.
 1")
Method 1: Freezer Jam — The Easiest Way to Start
Freezer jam is your best friend if you want homemade preserves without committing to a full canning setup. It’s fast, it’s forgiving, and you can have a finished batch in under 30 minutes.
Here’s the basic idea: cook your berries down until thick, sweeten to taste, pour into jars or containers, and freeze. That’s genuinely it. Keep one container in the fridge for immediate use and stack the rest in the freezer for up to a year.
A few tips for freezer jam success:
- Skip the glass jars and opt for plastic freezer containers instead — they handle the expansion from freezing much better and you won’t risk cracked glass in your freezer.
- Freezer jam tends to be softer and fresher-tasting than canned jam, which many people actually prefer.
- It’s the ideal way to use up fruit that’s getting a little too ripe — just cook it down before it goes bad.
Freezer jam is also a great low-pressure way to experiment with flavor combinations before you commit to canning larger batches. Think strawberry-basil, peach-vanilla, or blueberry-lemon.
 2")
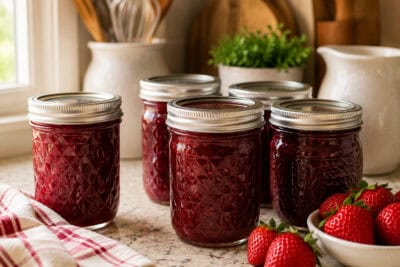
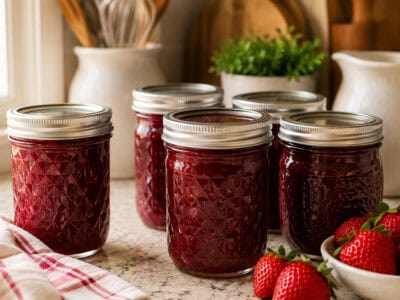
Method 2: Water Bath Canning — The Classic Approach
Canning is the method most people picture when they think of homemade jam — those beautiful rows of jars lined up on the counter, lids going ping as they seal. And yes, it’s deeply satisfying.
Water bath canning works by heating sealed jars in boiling water long enough to destroy any bacteria and create a vacuum seal. When done correctly, properly canned jam is shelf-stable for 12–18 months. That means you can stock your pantry with summer’s best flavors and enjoy them all the way through the grey days of winter.
 3")
🥫 Stay Organized This Canning Season
If you’ve ever forgotten what you canned, how many jars you have left, or what needs to be used up first… you’re not alone.
My Canning Planner helps you track your jars, recipes, pantry inventory, and canning schedule so nothing goes to waste (and you actually use what you worked so hard to preserve).
It’s simple, printable, and made for real-life busy kitchens.
Grab the Canning PlannerThe basic process looks like this:
- Sterilize your jars and lids in hot water.
- Prepare your jam or jelly and bring it to the correct temperature (usually 220°F at sea level for proper gelling).
- Ladle the hot jam into hot jars, leaving about ¼ inch of headspace.
- Wipe jar rims clean, apply lids and bands, and process in a boiling water bath for the time specified in your recipe.
- Remove jars and allow them to cool undisturbed for 12–24 hours — listen for those satisfying pops!
Important note: Always follow a tested, current recipe from a trusted source like the USDA Complete Guide or the Ball Blue Book. Canning safety guidelines have been updated over the years, and homemade recipes or older methods may not be safe. When in doubt, process longer rather than shorter, and refrigerate any jars that don’t seal properly.
 4")
The Frugal Case for Making Your Own Jam
Let’s talk money for a second, because that’s kind of our thing here at The Frugal Farm Girl.
A single jar of quality artisan jam at the grocery store can run you $8–$12. A batch of homemade jam using fresh or foraged fruit, a box of pectin, and some sugar? You can make 6–8 jars for a fraction of that cost — sometimes nearly free if you’re using fruit from your own property or a neighbor’s tree.
Beyond the savings, you control every single ingredient. No high-fructose corn syrup, no artificial colors, no mystery preservatives. Just fruit, sugar, and maybe a squeeze of lemon.
 5")
Getting Started: What You Actually Need
You don’t need a lot of fancy equipment to get started, which is another reason this is such a great beginner skill.
For freezer jam: A heavy-bottomed pot, a wooden spoon, a ladle, and freezer-safe containers. That’s it.
For water bath canning: All of the above, plus a large stockpot deep enough to submerge your jars, a jar lifter, and proper canning jars with new lids. A canning funnel makes the whole process much cleaner and is worth the few dollars it costs.
Making jam and jelly is one of those skills that sounds more intimidating than it actually is. Once you make your first batch — whether it’s a quick freezer jam or a full round of canned strawberry preserves — you’ll be hooked. It’s practical, it’s frugal, and there is something almost magical about eating food you made yourself.
Now go check what’s ripening in your yard. I have a feeling there’s a batch of jam in your future.
 DIY Roosting Bars for Chicken Coops
Leave a Reply