
It is hard to believe two years ago my husband built a barn and I redid our Kitchen. It felt a little crazy and overwhelming at the time. Today two years later, I’m so glad we did it.
When it comes to tackling DIY projects in your home, it’s best to just go all in. For some of us, we can overthink it, and constantly convince ourselves there will be a “better” time for it.
When you are doing life, and you mix in everything else that comes with it, there isn’t a perfect time.
Unless you are going to go into debt to do it. BUT if you are going to do it yourself, you will pay less.
We are debt free and our story is here. This month we will reach our BIGGEST goal- paying off the mortgage!
The key is if you have the money or you want to do a DIY project and you start saving for it; and the funds are all there, and you are willing to give it a go yourself, go for it.
Youtube everything you are nervous about, research and research some more.
Then dig in.
You can see the entire post with a lot of before and after pictures of our farmhouse kitchen here. The barn post is here.
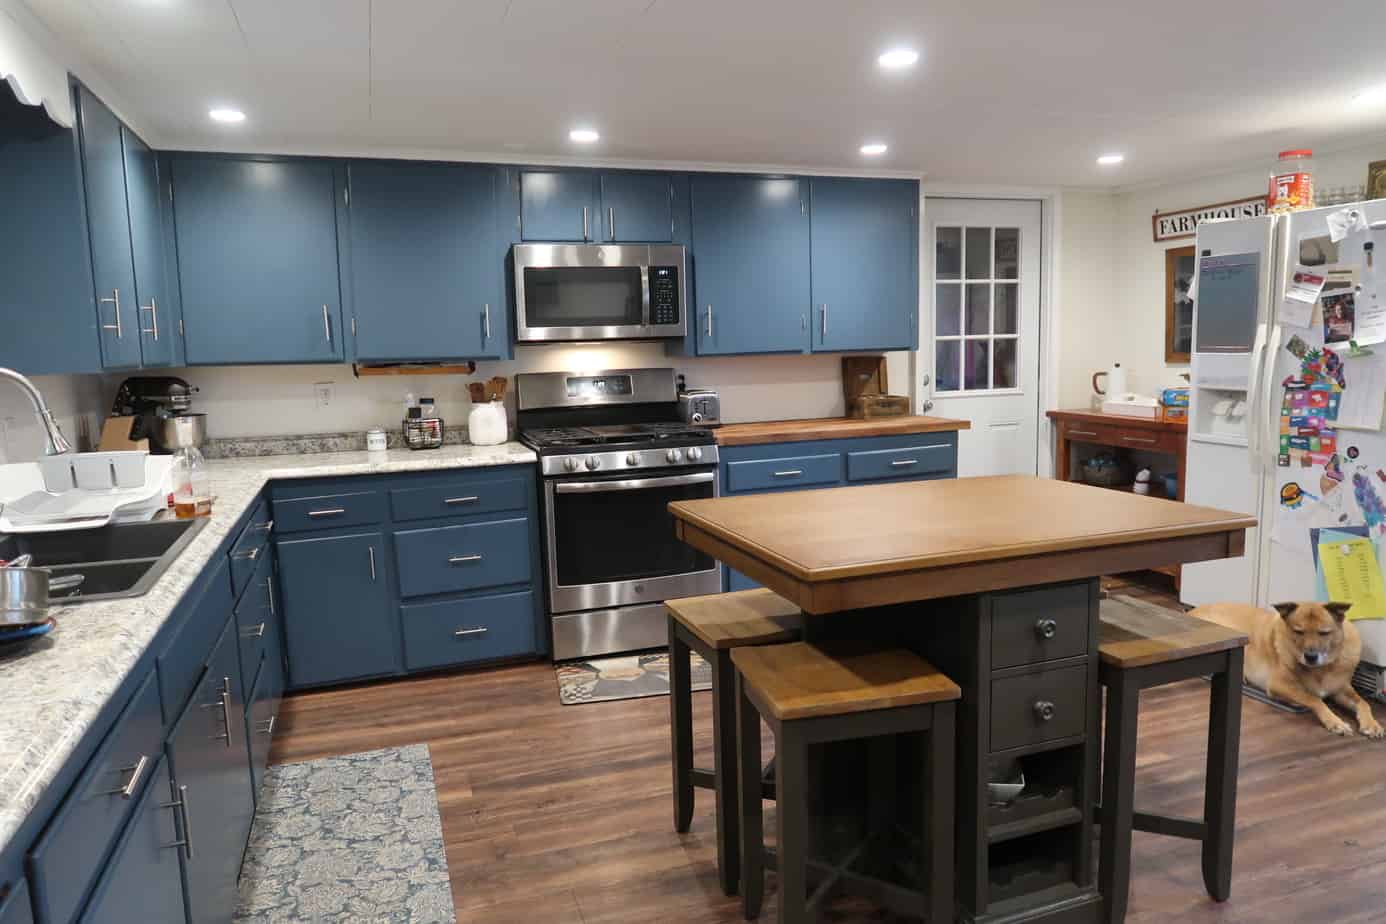
Today I’m sharing with you how this farmhouse kitchen is holding up two years later.

Last month we bought a table to work as the island. If you are new, I like a deal on everything. It pains me to spend a ton of money on anything. Items on clearance always call me over.
Also our house was built in the 1850s.
I found two tables at TJMaxx I thought would accent with the blue in our kitchen really well. And for under $200 I was excited. ( You can see these in the post here)
Two years later, we were roaming around Raymour and Flanigan and my husband sat down at this table.

All he had to say was “This would be nice in our kitchen.”, and look where it is now.
We used to eat in the kitchen before we redid it.
I love it. The only complaint is I’m not a huge wine drinker. Any creative ideas with what to do instead are welcome in the comments below.

I didn’t want to totally get rid of the previous island so I stuck it next to the fridge. With the picture my brother took of the cows across the street.

Yep I still have the white fridge. Until it dies, I’m keeping it. BUT it’s a good 20+ years old, it may be on it’s way out soon… (fingers crossed!)
Read or Pin: How to Get A Deal on Kitchen Appliances
How is the paint holding up?
A week ago I noticed a piece of wood came of the cupboard. This wasn’t the paint chipping. It was an actual piece of wood coming off. Our cabinets are over 50 years old. Plus they were handmade by one of the previous owners.

It’s another reason I didn’t bother to paint the inside of the cupboards.
And there is one spot that did chip. But it is super easy to touch up with the extra paint.


For two years later, two dogs, two kids and a cat, I’m happy with it. The fact that these drawers are pretty hard to push close, I’m impressed it didn’t chip more.
The paint we used was Behr Paint and Primer. I have the entire list of items we used and how much we spend on this makeover HERE.
The cupboards are easy to wipe down.
And the realest part of this DIY Kitchen makeover, is it’s not entireley finished. See that baseboard?

It really is hard to see, and well I’m not pushing my husband to finish it. It’s fine for now.. Until he sees this post 🙂

If you are doing a DIY project and every little thing isn’t complete. It’s totally normal. That’s part of it when you do things yourself.
If you need tips and inspiration when doing a DIY project with your spouse read this here.
Sometimes it’s worth it, to let the little things go. To stand back and look at all that you have accomplished. And soak that in a minute longer.


HI! Please be careful when you shop for a new fridge and check quality reports. We redid our kitchen and bought a new Samsung in 2019; love everything about it except the Ice Maker has an extremely poor reputation and it takes up alot of space and bulk inside the fridge. We had to buy a cabinet ice maker to set beside our fridge. All our appliances came from a local discounter and we are happy except for Samsung fridge. We called the repairman many times before we gave up. Samsung refused to correct the ice maker.
Oh man! Thanks for sharing that tip.