
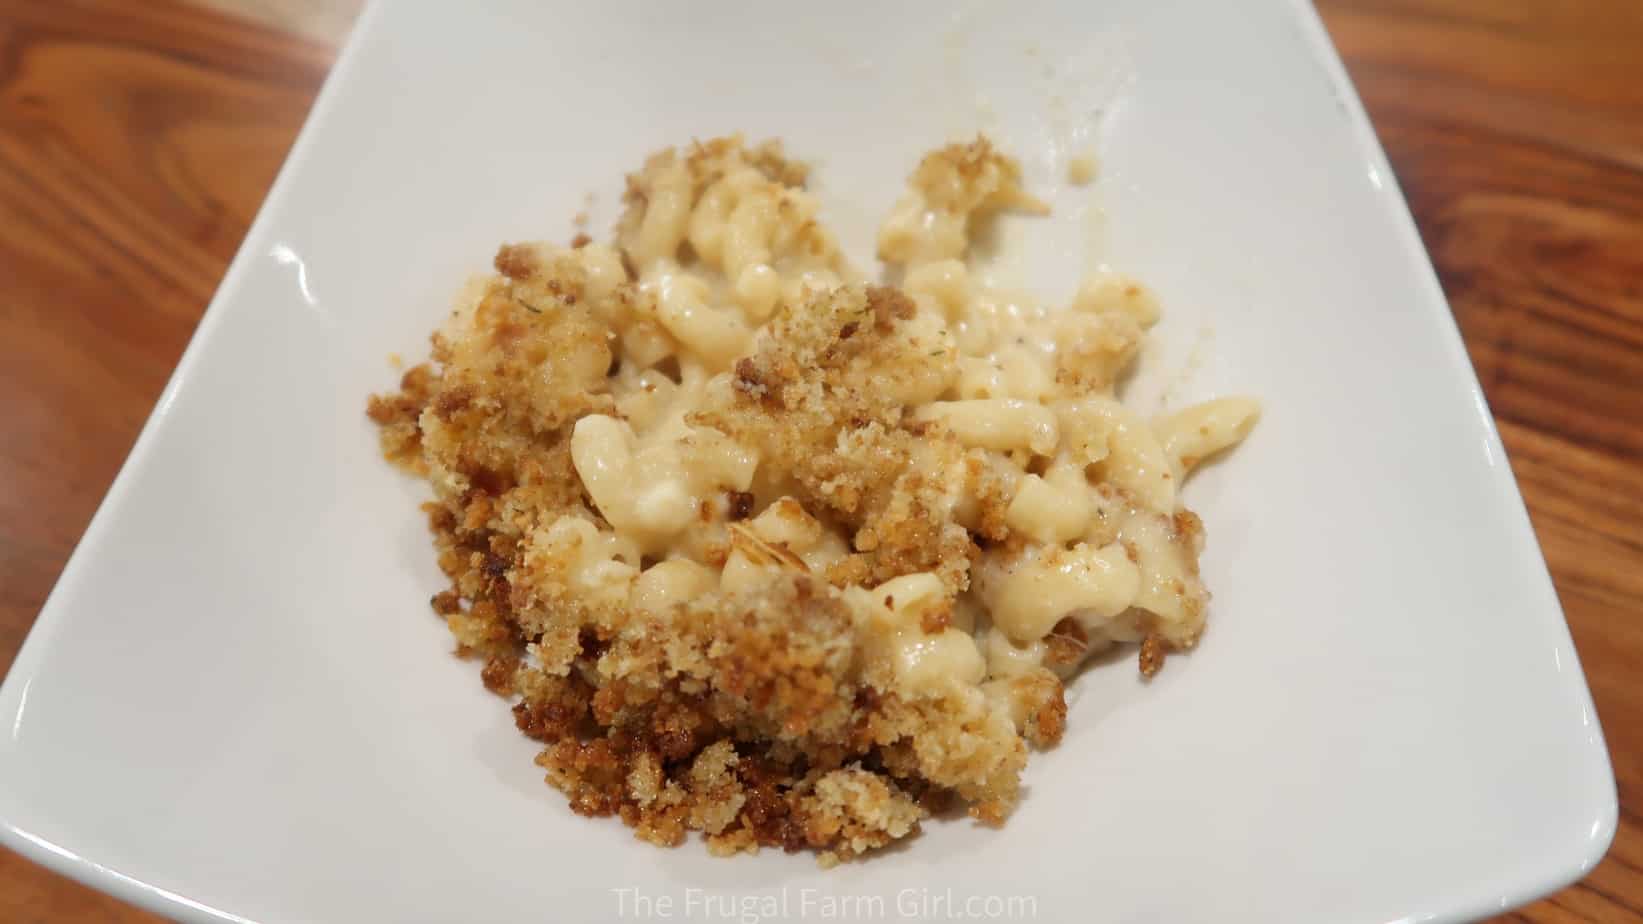
Wondering how to cook macaroni and cheese in a pressure cooker? Pressure cooking pasta is my new favorite way to get meals done fast. You can make homemade mac and cheese in 14 minutes with this recipe.
I grew up in Wisconsin and my mom loved to make all our meals from scratch. Homemade mac and cheese wasn’t on the list. I’m not sure if it is a midwest thing or not. Once we moved to the East coast I find it at almost every outing or event.
Using a pressure cooker or in my case the amazing Ninja Foodi you can have this simple meal done in 20 minutes.
The Ninja Foodi is finally in stock online and Amazon has it on sale and there is a $20 coupon to clip. This is current as I’m writing this on 2.8. Price will update below.
New here? See my other Ninja Foodi or pressure cooking/air frying recipes below.
- Easy & Delicious Pizza Pasta Bake in Ninja Foodi
- How to Cook a Whole Chicken in Ninja Foodi
Vension Roast with Veggies Recipe inFoodi Ninja
I also made a crucial mistake with my Ninja foodi. The same could be done in any pressure cooker. It was not fun and could have even affected the taste of our mac and cheese. Keep scrolling friend.
This recipe comes from the Ninja Foodi Booklet.
The following recipe is from the Ninja Foodi booklet that comes with the Foodi. This is not a traditional tasting mac and cheese recipe.
If you want to see Ninja Foodi Recipes I love ( this mac and cheese one is not our fav) see below.
- Easy Restaurant Quality Ninja Foodi Yeast Rolls
- Upside Down Taco Nachos in the Ninja Foodi
- Easy Chocolate Chip Skillet Cookie in Ninja Foodi
- Easy Way to Make Hot Dogs in Ninja Foodi
- 33 Easy Pantry Staple Meals You Can Make For Cheap
INGREDIENTS
- 1 Tbs. Baking Soda
- 1/2 cup lemon juice
- 5 cups water
- 1 box dry elbow pasta
- 1 cup heavy cream
- 1 bag or 16 ounces of shredded cheese
- 2 tsp. salt
- 1 tbs ground black pepper- After myself and others we would say to change this to 1 tsp.
- 1 tbs onion powder- After myself and others we would say to change this to 1 tsp.
- 1 tbs garlic powder- After myself and others we would say to change this to 1 tsp.
- 1 tsp dry mustard
- 2 cups panko or Italian bread crumbs
- 1 stick or 1/2 cup butter
I used whole milk in place of the heavy cream. I don’t normally buy heavy cream and we drink whole milk. I’m not sure if this has much effect on it. You can always let me know in the comments below.

Next add the water and dry pasta and stir.
Put on your pressure cooking lid and make sure the valve is to seal. Select Pressure and LO. Set time to 0 minutes. Pretty cool the time it takes it to reach pressure is all the time the pasta needs to cook.
Now here my friend is where I made a BIG mistake. Read this carefully if you are using the Ninja Foodi recipe book.
When Pressure cooking is complete – ALLOW PRESSURE TO NATURAL RELEASE FOR 10 MINUTES. Did you see that?
Not quick release it. Like I did.
I’m new to the pressure cooking game, and all the other ones it’s always been quick release pressure.
My Big, Messy Mistake
I quick released it and it shot out quit loudly. I thought hmm it’s making a weird noise.
I noticed the steam coming out was clouded. Not thin. Something was in it. It was exploding onto my cuboards. There was stuff all on the lid.
I quickly closed the valve and like a smart woman I re read the directions. Except I still didn’t read the directions right.
“Hmm it says to quick release.” I open the valve again.
Its starchy chunky water spraying up into the air. Again I think smart and grab a towel to stop it from shooting over to the cabinets. ( I’ve rehomed the Ninja over to the coffee bar area not by any cupboards at all)
Now the towel is quickly becoming saturated and the lid of the Ninja is getting hammerd.

And to make it worse, my husband decides to walk out in this diaster of a moment.
‘What’s going on?”
“Oh nothing. It’s quick releasing.”
He walks closer. Looks at me.
“Yeah I have no clue what it’s doing, somehow I messed up cooking pasta.”
He says. ” Yeah that doesn’t look right.” He walks out.
Well, that was that. 🙂
Be sure to leave that valve closed. It was NOT fun to clean the lid. Thankfully my favorite little scrubbers saved it. I don’t think I would have cleaned it very well without them.
NEXT STEPS
After the pressure has naturally released for 10 minutes then put the valve to vent.
At this point it will function normally. No mess.
Add the remaining ingredients, except bread crumbs.
Stir well to melt cheese and get everything mixed up.
In a bowl stir together the melted butter and bread crumbs. Spread it on the top of the mac & cheese.
Close the crisping lid. Select Air crisp set temp. to 360° F and set time to 7 minutes. Select
When it beeps it’s time to serve.

Now you have made pressure and air crisped Mac & Cheese dish in about 14 minutes! Pretty awesome!
Everyone enjoyed the mac and cheese dish. My husband and youngest daughters are huge fans of Macaroni and cheese and they loved it. Our five year old didn’t care for the bread crumbs. It wasn’t my favorite taste of Mac and cheese but I was excited to pressure cook it. Not sure why the Ninja Foodi booklet calls for such huge amounts of the spices.

SIDE DISH NOTE:

I served this with the
You could steam these in the Foodi but after my whole episode I just did these on the stove!
I followed this recipe and I liked how it came out. (Note: Even after 10 minute natural release, it still sputtered for a while. Maybe a longer natural release?) Anyway, the consistency was great, but I think the recipe over-does the onion powder and garlic powder. It was … okay … but what I didn’t eat got tossed and I noted to reduce them (and maybe the kosher salt) next time. I think that will make it better.
Hey Bill! You know I agree if I was to make this recipe again I would do less on the onion and garlic. I always think fresh garlic tastes better than the powder.
Just made this and agree that the seasonings need to be decreased. Also, let the pressure naturally release longer than 10 min, maybe more like 15.
My fiance and I made this mac recipe today (after he impulse bought a Foodie LOL). It tasted wayyyy too salty. We each ate only half of what was on our plates and tossed the rest. Next time we will definitely be reducing the amounts of spices (salt, pepper, onion powder, garlic powder, and mustard powder!). I am thinking teaspoons of each (not tablespoons!) would be sufficient.
Also, do you know the purpose of the lemon and baking soda mix at the beginning?? Just curious!
Yes I am going to add that into the recipe post we thought it was a salty too. I have no idea why they have that in the beginning? Maybe someone else will know?! 🙂
My Foodie Recipe book says 2 TABLESPOONS of Kosher salt, not teaspoons! I read it multiple times to be sure I was seeing it correctly because I couldn’t believe that a recipe would call for that much salt! Not sure if it is a typo or not. My husband agreed that was WAY too much salt so we only added 1 tablespoon. Even then I cringed as I was putting it in against my better judgement. Needless to say it was almost inedible from being so salty and the tablespoons of garlic and onions powder were overkill as well. We also didn’t like all the breadcrumbs because it took away from the creaminess of the Mac and Cheese and made it dry. We are going to try this again because it seems like it had the potential to be awesome, but with A LOT of tweaking! Do not follow the crazy amount of spices that the recipe in the Foodie book calls for! I would probably reduce or leave off the breadcrumbs as well unless you like drier Mac and cheese. Question – did anyone else have a lot of liquid left after cooking the pasta? It was a good cup or more left in the pot. I drained most of it out, but I wasn’t sure if I should have left it.
Hi Christina, yes myself and others agreed after making the Foodi recipe way it was too much which is why I put that in parenthesis at the top.
Has anyone else tried this recipe with gluten free macaroni? Aside form it being pretty much inedible because of the spices, I thought the noodles were a little too mushy. Was not sure if this was because the noodles were gluten free or not.
Did you follow the spice amount in the Ninja Foodi booklet? Many of us are surprised they called for such a huge amount. I haven’t tried it using only a teaspoon but I agree the spices are a bit much.
I just made this — and before finding this review and comments. I had already decided to cut back the salt to a scant tablespoon because of the baking soda and the cheese (I didn’t have a full 16 oz of sharp cheddar, so I made up the difference with some shaved Parmesan and some mozzarella). The other spices seemed a bit heavy-handed, too, so I cut them back by half (except for the 1 T coarse ground pepper I used). I thought the lemon juice/baking soda had something to do with the amount of pasta scum left behind to clog the pressure valve — but I could be mistaken. My pressure vent spewed too, even after a 10 minute rest. Also – some of my pasta turned green. What’s with that? Does anyone have a clue?
Oh my goodness green? I have no idea.
Mine turned green too. It was nasty. My son said it smelled like airplane seats! LOL. My kids now jokingly( I think) hate my foodi. What is the purpose of lemon juice and baking soda??
I am not sure, I’ve never put those two together for Mac and Cheese before. I may try to reach out to the Ninja Foodi people and see.
Oh, I forgot to add – I like this the way it ended up. I ate some before I put the topping on it and decided it was finished as it was. After reading the comments here, I think I made the right decision.
I just got the foodi for Christmas & was excited to try it out with this recipe thinking “I can’t mess up mac & cheese” & the first time I made the same mistake as you!! So okay I clean it out & try again… And my pasta turned brown BOTH times! Even the correct way. Is this happening to everyone else? I don’t know what I did wrong, I made sure to follow to recipe to the letter after my first mistake. I couldn’t even eat it, & my husband said it tasted like cardboard. Hoping I am not alone here??? Help!
Hey Kristin, yes this isn’t the best recipe in the Foodi. Honestly I haven’t attempted mac and cheese in it since. I did the Pizza pasta bake and that turned out really good. I do a lot more rice in it than pasta.
We did this tonight. It came out alright, everyone is pretty happy with out first Foodi meal. Definitely adjusting the spices. We used a Colby Jack and mild cheddar mix, but I’ll probably try sharp cheddar next for a stronger cheese flavor. Unsure what the purpose of the baking soda and lemon juice was, we thought maybe it was to help prevent sticking? But if it’s not included in all pasta recipes, then that’s probably not it.
So does it have a lemon taste? Why is there lemon juice?
There isn’t a lemon taste. I think it has something to do with the reaction for the baking soda.
Made Mac & cheese for first time in my foodi. It tasted good but the brown color made it strange. I asked my husband, who loves Mac & cheese if he liked it. He said he thought it would taste creamier. I used cheddar that he loves. But when I asked if he wanted me to make it again sometime he cautiously said no. So, I may try it on the stove, use velvets cheese and see how it goes. I read pasta could turn brown if you added the pasta before the water boils. Learn something new all the time.
Hmm interesting. We haven’t made it yet again, but I’m thinking about tweaking the Ninja Foodi recipe to something of my own and sharing it.
I made this twice and both times a “odor” came from the release and pasta was brown and mushy. We had to open the windows in the house to vent it. Ha! It didn’t taste bad but it was not good. I noticed that in your recipe you say 5 cups of water, in the ninja foodie recipe it says 8 cups of water. I guess I can try it one more time with 5 cups of water.
I’m not sure other than most of us are not a fan of the Ninja Recipe for this one. 🙁
Just wondering why the lemon jiuce/ baking soda mixture? what does it doo for pasta
I am not sure either, but I haven’t made this recipe since! lol
We reduced all the spices by half, except the mustard, and my family was pretty happy with the result. Ours had an off-color, too, though like others have mentioned. A little Googling leads me to believe that the lemon juice and baking soda combination is intended to act as a stand-in for sodium citrate, which will help keep the sauce creamy rather than separated.
Thanks for the tip! Glad your family liked it.