
If you are looking for a restaurant-quality yeast roll, this is your Recipe. This Ninja Foodi Yeast roll is delicious, but I did have a mishap the first time I made them.
I will be sharing what worked and what didn’t work.
These air fryer bread rolls are a hit and would be a perfect addition to any holiday dinner.
They quickly pull apart. I took the whole thing out of the air fryer as one piece and let the kids tear apart their wanted ones. For some reason, that was a blast to them.
I love how the top turns out nice and brown and crispy. But, of course, I always use eggs at room temperature too.
I used the Recipe from the Ninja Foodi Booklet. This one is worth trying. They taste like fresh bread we recently had served at the Cheesecake factory.
I’m excited to whip these up more often.
You need to keep in mind the only thing is letting the yeast rise. You want your dough to double, and it takes a reasonable hour.
I always buy yeast at BJs or Costco. I keep it in the fridge in a mason jar to help it last longer. You can get 2 lbs of yeast at BJs or Sams for $4.99. If you don’t do a lot of baking, you can pick up the smaller packets at Walmart, but you’ll be wasting money that way if you make bread weekly.
It’s worth it to even get a BJ’s membership for $25 or Sam’s or Costco for the year to purchase baking goods.
(Check out this post on how these five grocery items pay for our BJs membership and more)
*Scroll down for Recipe.

I tried my best to make it even! Does anyone else relate?

It doesn’t have to be perfect, but something like this when cutting is how I end up doing it.

Then roll each piece a bit; it doesn’t have to be a perfect circle.

I love how these go from this to the final picture.
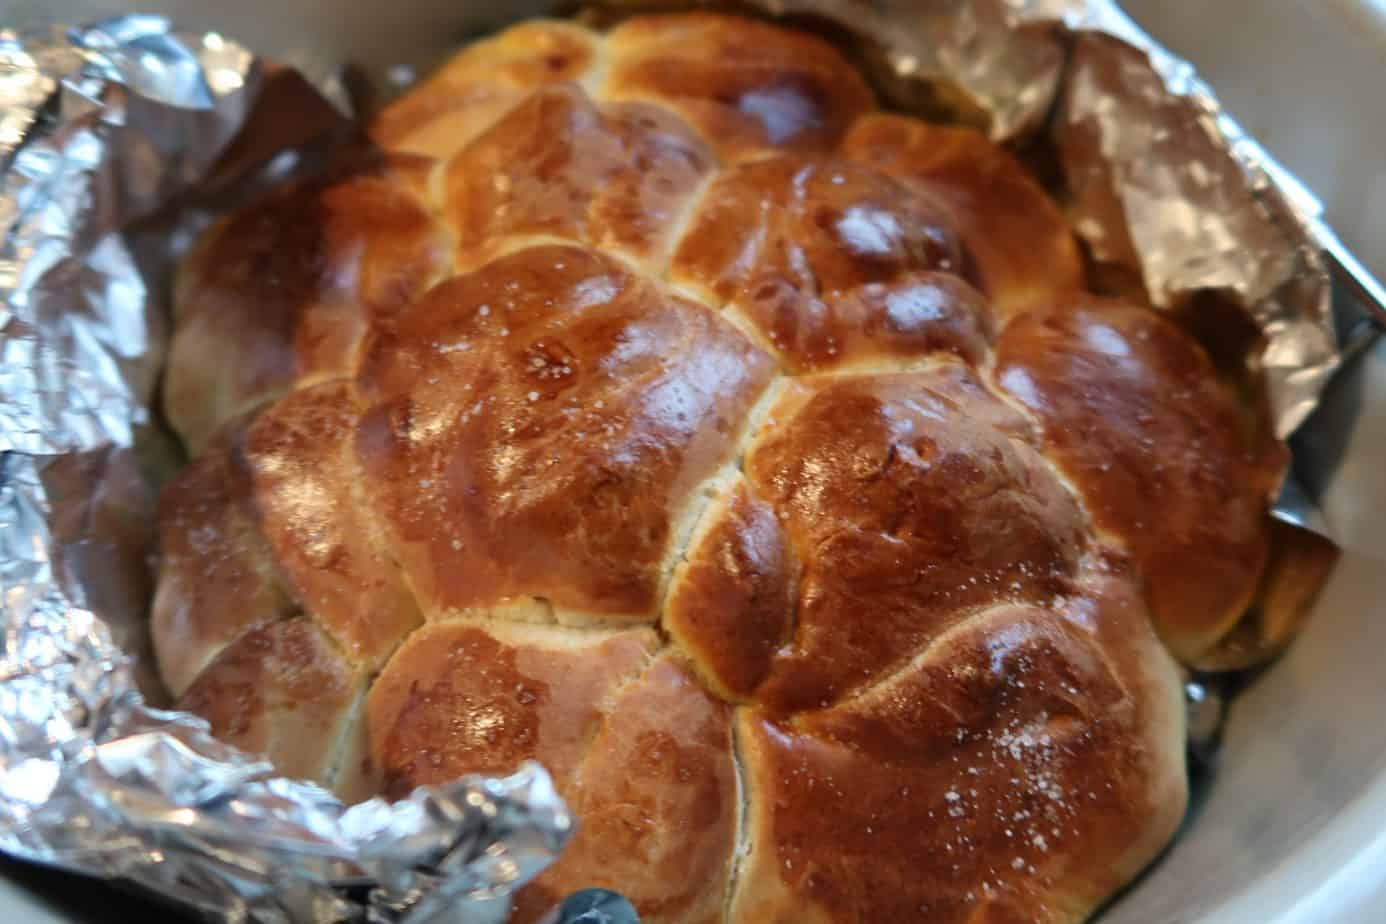
Don’t bother with the tin foil. I thought I didn’t want it to stick to the rack, BUT it won’t cook the bottoms all the way. You can use cooking spray on the stand if needed.

We use acceptable sea salt as our everyday salt, but I had this in the pantry and used it for the tops. I loved the addition of a chunkier salt on the top of the rolls. It is NOT overkilled. You don’t want to skip this step.
Using Himalayan salt isn’t necessary; you can use any coarse salt you have.

After brushing and salting, they look a little something like this.

Seeing this image again reminds me to put this on the menu for next week. If your kids are like mine, eating a roll for a snack is one of their favorites.


Ninja Foodi Yeast Rolls

A delicious Restaurant like yeast roll in your Ninja Foodi.
Ingredients
- 3/4 cup milk
- 1/2 stick (1/4 cup) unsalted butter, cut in pieces, plus more for greasing
- 1/4 cup sugar
- 1/2 package (1 1/8 teaspoons) active dry yeast
- 1/4 cup plus 3 1/2 tablespoons warm water, divided
- 3 large eggs, divided
- 1/2 teaspoon kosher salt
- 3 cups plus 1 tablespoon all-purpose flour
- Coarse sea salt, for sprinkling
Instructions
Place milk into the pot. Select SEAR/SAUTÉ and set to MD:HI. Select START/STOP to begin. Bring to a gentle simmer, then press the START/STOP button to turn off SEAR/SAUTÉ.
Remove pot from unit, stir in the butter and sugar, and let cool until below 110°F.
In a small bowl, stir together yeast and 1/4 cup warm water. Let sit until foamy, about 10 minutes.Once milk mixture is cooled, add 2 eggs, yeast mixture, salt, and 1 1/2 cups flour to a mixer fitted with a dough attachment. Mix until a smooth paste has formed. Add the remaining flour, 1/2 cup at a time, and stir until a smooth ball forms. Add additional flour, 1/2 tablespoon at a time, if dough appears too sticky.
Remove dough from the bowl and knead by hand on a floured surface for about 5 minutes.
Wipe out the pot, then lightly grease it with butter. Place kneaded dough in pot. Cover dough with plastic wrap and let rise in a warm place, until doubled in size, about 1 hour.
Turn the dough out onto a floured surface. Punch down the dough, then divide evenly into 12 pieces. Shape each piece into a small ball and place in a greased Ninja® multi-purpose pan* (or an 8-inch baking pan). Rolls should be touching with visible gaps in between.
Beat the remaining egg with 1 teaspoon water. Gently brush the tops of rolls with egg wash. Add 3 tablespoons water to the pot. Place pan on the reversible rack, making sure rack is in the lower position. Then place rack with pan in pot.
Select SEAR/SAUTÉ and set to LO. Select START/STOP to begin. Cook for 5 minutes, then press the START/STOP button to turn off SEAR/SAUTÉ. Allow rolls to rise for another 15 minutes in the warm pot.
Remove rack and pan from pot. Close crisping lid. Preheat the unit by selecting BAKE/ROAST, setting the temperature to 325°F, and setting the time to 5 minutes. Select START/STOP to begin.
After 5 minutes, place rack with pan in pot. Sprinkle rolls with coarse sea salt, then close lid. Select BAKE/ROAST, set temperature to 325°F, and set time to 25 minutes. Select START/STOP to begin.
When cooking is complete, allow the rolls to cool, then pull apart and serve.
Notes
I tried using tin foil on the bottom my first time, and the bottoms didn't cook through all the way. Stick to using the reversible rack and it will come out just fine.
Check out my other Favorite Ninja Foodi Recipes below.
- Easy Restaurant Quality Ninja Foodi Yeast Rolls
- Upside Down Taco Nachos in the Ninja Foodi
- Easy Chocolate Chip Skillet Cookie in Ninja Foodi
- Easy Way to Make Hot Dogs in Ninja Foodi
- 33 Easy Pantry Staple Meals You Can Make For Cheap
- Venison Bacon Burgers in the Ninja Foodi
- The Best Ninja Foodi Accessories
- The Best Ninja Foodi Beer Brats
- Easiest Venison Tacos Recipe in a Ninja Foodi
- The Best Classic Meatloaf in the Ninja Foodi Fryer
- How Dried Apples Taste & Turn out in The Ninja Foodi
Do you Love Tiktok? I, to be sure to follow me over there!
Leave a Reply