
Making meatloaf in your Ninja Air Fryer is easy! However, I was initially intimated, wondering how it would shape without the traditional loaf pan. But once you get into this cooking adventure of flavors and textures – there’s no turning back time.
We’ve got you covered! This easy meatloaf recipe can be made right in your Ninja Foodi.
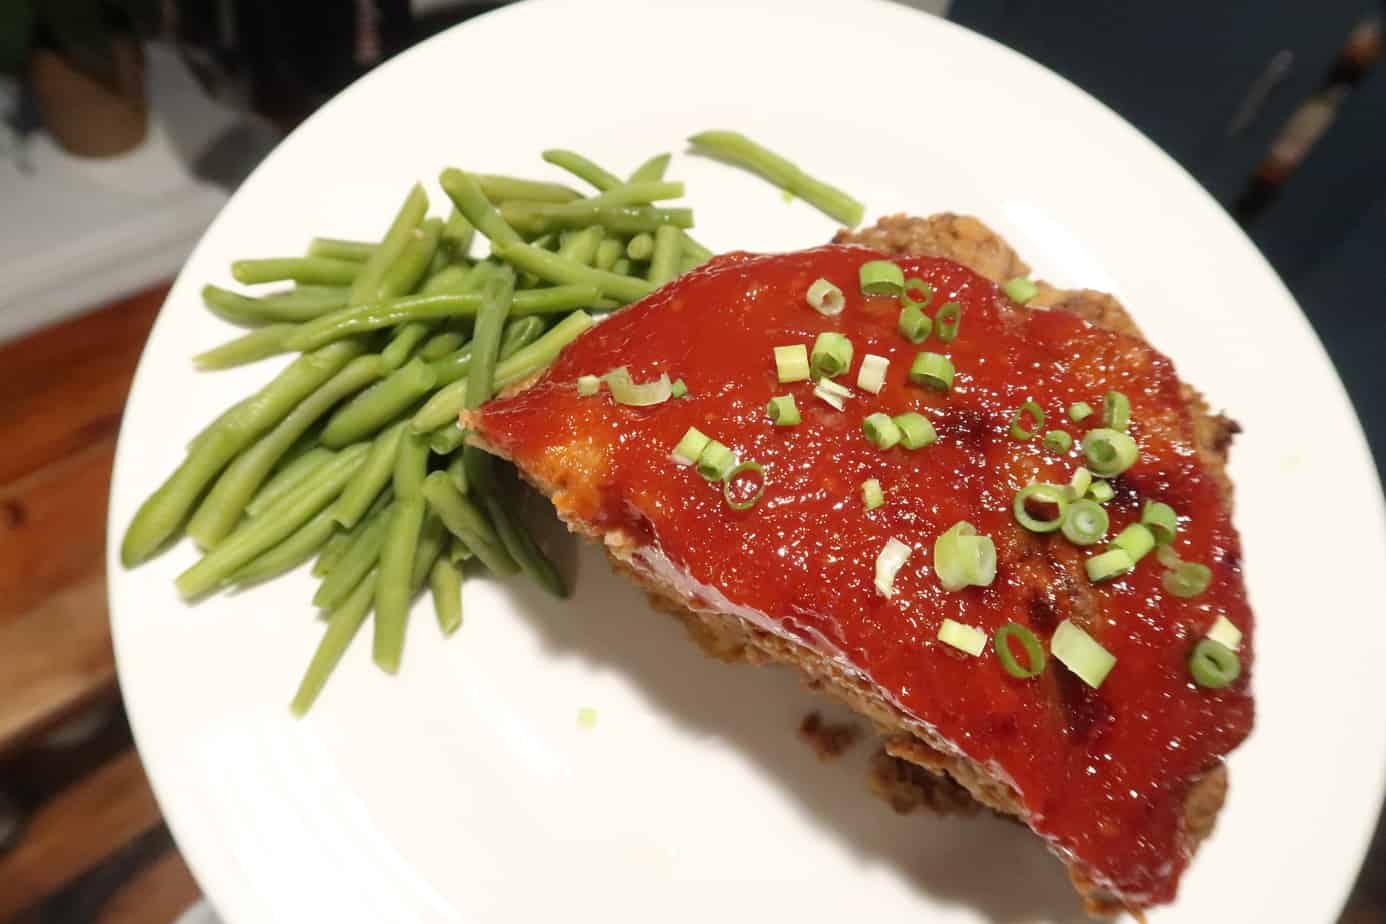
You’re going to love this meat loaf recipe! The meatloaf is juicy and flavorful, and the glaze is sweet and tangy. Serve it with mashed potatoes and green beans for a complete meal everyone will love.
First off, let me say I’m not a food blogger. If you are new here, I’m all about giving an honest opinion to help you all.
I share ways to save money and stick to a strict budget for everything from food to your animals. I got a Ninja Foodi last year for Christmas and shared what I learned here with my readers. The cooking time is about 45 minutes, but that’s pretty much hands-off.
I put a spin on the traditional meatloaf recipe and made this an easy air fryer meatloaf. Using the onion soup mix packet makes this a dump-and-go meal.
It gives it a fantastic flavor, too. One my entire family enjoys, and we all know that can be rare!

Let me tell you why this Ninja Foodi meatloaf recipe is about to become your new best friend.
You know those sweltering summer days when even the thought of turning on the oven feels like you’re summoning a mini sun into your kitchen? With this recipe, you can wave goodbye to that sweaty nightmare because no preheating is required. We always use our Ninja Foodi in summer, especially for brats and hot dogs!
And let’s talk health, shall we? While I firmly believe in the ‘a little bit of what you fancy does you good’ philosophy, I also know that cutting down on fat is never a bad idea.
Enter our trusty Ninja Foodi. Its pressure cooking process is a bit like a magic trick – it makes the fat drain away from the meat. It’s like having your cake and eating it too, but in this case, it’s meatloaf and not cake, but you get the gist!
Now, onto the air fryer basket. This little guy has holes at the bottom, which not only help with the whole fat-draining business but also ensure an even cook for your meatloaf.
But what about the crunch, you ask? Everyone knows the best part of any meatloaf is that crispy exterior. Well, the Ninja Foodi, you ultimately control the crunch factor.
And the best part? You can check on your meatloaf as often as you want without hassle. Just lift the air-crisp lid, take a peek, and a simple button push will do the trick if it needs more time.
I have substituted ground venison in this recipe, which works just as well. I like adding a little milk to my venison to remove some of the gameness.
BASIC INGREDIENTS
- 3 Eggs
- 2 lbs. ground beef ( I get ground beef at BJ’s or Costco for the best price)
- 1/4 c. milk
- 2 cups breadcrumbs ( I used Whole Wheat)
- One packet of onion soup mix ( I used Lipton) ( Or make your own in the recipe below)
Topping Ingredients
- 1/2 cup Ketchup
- 2 Tablespoons Brown Sugar
- 1 teaspoon dry mustard
Recipe for Onion Soup Mix
Ingredients:
- 8 teaspoons dried onion flakes or if you can find, toasted onion flakes even better!
- 1 1⁄2teaspoons dried parsley
- 1 teaspoon onion powder
- 1 teaspoon turmeric
- 1⁄2teaspoon celery seed
- 1⁄2teaspoon sea salt
- 1⁄2teaspoon cane sugar
- 1⁄4teaspoon ground pepper
DIRECTIONS
You will use the pressure cooking and air frying settings on your Ninja Foodi.

First thing, mix all ingredients besides the sauce ingredients in a large bowl.
Then, form the meat mixture into a nice oval shape.
Add 1 1/2 cups of hot water to the Ninja Foodi pot. Using hot water in your pressure cooking settings will take less time to reach pressure. If you don’t use hot water, it’s okay, no worries, it may just take a few minutes longer to heat up.
You can keep this in mind for next time. Overall the whole thing takes about 45 minutes of cooking time.
You will be using your air fryer basket to cook the meat in. This will allow the grease to drip down.
I sprayed my air fryer pan with nonstick cooking spray. Add your meatloaf to the basket and place it inside your Ninja Foodi.

- Grab your pressure cooking lid and make sure your knob is on the seal side. You don’t want my major mishap with chicken in the Foodi.
- Hit the Pressure button time for 25 minutes.
- Once the time is up, let the Ninja Foodi naturally release pressure for 10-15 minutes. Then, release steam.
- Remove your air fryer basket and dump out liquid and grease from the pot.
- Place your air fryer basket back inside the Ninja Foodi.
- Add your topping to the loaf. Some people use barbeque sauce as well.
- Close the Air crisp lid and set it to Air Crisp.
- Set the time for 10 minutes at 390°.
- I sprinkled green onions on top after and sliced it up after letting it rest for a couple of minutes.
The internal temperature of the meatloaf should be 160 degrees Fahrenheit if you are looking for an exact temperature.

I was so happy with how delicious this turned out. It may just be my love for the Ninja Foodi, but everything turns out so tender.
At this point, don’t try to lift your meatloaf out. It was a little moist at this point, but the air frying part takes care of that in a good way.

The Onion mix makes a moist and flavorful meatloaf. It slipped right out of the basket.

Tired of looking at the Ninja Foodi on your counter? Check out these cute Food Cover ups!

It was a breath of fresh air to see my kids love it. They usually like meatloaf, but they love the onion soup mix. I used it in our Venison burgers too. It can be a home cook’s best friend.

Check out these easy Ninja Foodi Recipes
- Easy Restaurant Quality Ninja Foodi Yeast Rolls
- Upside Down Taco Nachos in the Ninja Foodi
- Easy Chocolate Chip Skillet Cookie in Ninja Foodi
- Easy Way to Make Hot Dogs in Ninja Foodi
- 33 Easy Pantry Staple Meals You Can Make For Cheap

So there you have it, my dear friends! You’ve just followed me on a culinary journey, a quest to create the most divine, mouth-watering meatloaf in your Ninja Foodi. And guess what? It wasn’t that hard. If I, who once managed to burn boxed mac and cheese, can do it, you definitely can too!
I hope your kitchen is now filled with the rich, comforting aroma of perfectly cooked meatloaf, making your stomach rumble in anticipation. And when you finally sit down with your family and see their faces light up at that first bite, isn’t that just the best feeling in the world?
Remember, cooking isn’t about perfection. It’s about love, laughter, and a little bit of mess. So go forth, my fellow Ninja Foodi warriors, armed with your spatula and this recipe, and conquer the dinner table like your culinary champions!
Until next time, keep your aprons ready and your taste buds curious. Who knows what delicious adventure we’ll embark on next? I can’t wait to share more of my kitchen escapades. Happy cooking!
Check out how to make venison burgers in the Ninja Foodi!
The Best Classic Meatloaf in Ninja Foodi
I put a spin on the traditional meat loaf recipe. Using the onion soup mix packet makes this so easy. It gives it an amazing flavor too. One my entire family enjoys, and we all know that can be rare!
Ingredients
- 3 Eggs
- 2 lbs. ground beef ( I get ground beef at BJs or Costco for the best price)
- 1/4 c. milk
- 2 cups breadcrumbs ( I used Whole Wheat)
- 1 packet of onion soup mix ( I used Lipton)
Topping Ingredients
- 1/2 cup Ketchup
- 2 Tablespoons Brown Sugar
- 1 teaspoon dry mustard
Instructions
- First mix all ingredients beside the sauce ingredients in a bowl.
- Then form the meat into a nice oval shape.
- Add 1 1/2 cups of water to the pot.
- You will be using your air fryer basket to cook the meat in. This will allow the grease to drip down.
- Add your shaped meat to the basket and place inside you Ninja Foodi.
- Grab your pressure cooking lid and make sure your knob is on the seal side. You don’t want my major mishap with chicken in the Foodi.
- Hit the Pressure button time for 25 minutes.
- Once the time is up let the Ninja Foodi naturally release pressure for 10-15 minutes. Then release steam.
- Remove your air fryer basket and dump out liquid and grease from pot.
- Place back inside the ninja foodi with the air fryer basket.
- Add your topping to the loaf. Some people use barbeque sauce as well.
- Close the Air Crisp lid and set to Air crisp.
- Set the time for 10 minutes at 390°.
- I sprinked green onions on top after and sliced it up.
Notes
You will be using the pressure cooking and air frying setting on your Ninja Foodi.
I sprayed my air fryer pan with cooking spray.
Don't lift your meatloaf out before you air fry, it will be mushy and soft, that is normal. Once you air fry it will come out easily.
Recommended Products
As an Amazon Associate and member of other affiliate programs, I earn from qualifying purchases.


It was delicious!! I will be making this one again. The only other ingredient I added was one tablespoon of Worcestershire sauce.
Awesome!
I made this several times and each time went awesome!! Thanks for sharing this with us.
Awesome so glad you like it. I’m excited fall is around the corner to make this often again 🙂
It was delicious!! I will be making this one again. The only other ingredient I added was one tablespoon of Worcestershire sauce.
Glad to hear it- I’ll have to try adding worcestershire I bet that deepens the flavor a bit?
Thank you so much for this delicious recipe. I love all of the recipes that i’ve try and will continue to try some other ones you have posted. Keep up the good work.
Thank you so much!
this was moist and tasty! i think next time i’ll add some minced onion and make a little extra topping sauce to mix in the batter. mine was super stuck to the pan! but who knows why. is there a spot to print the recipe without the pics that i am missing?
thanks for sharing this!
I just added a new feature to the website to make printer friendly recipes. Going forward I want to share more Foodi recipes so this was much needed. Thank you for giving me the push to do it.
I use bread crumbs and an egg to hold mine together. Italian bread crumbs gives the meatloaf a great flavor.
Thanks for the recipe … my wife and aunt at 93 years old loved the recipe. I used ground pork with ground beef with a mild salsa w/brown sugar/mustard mix for the topping. It turn out great in my ninja foodi.
Awesome!! Thanks for sharing that 🙂
trying this recipe tonight for dinner, so far i am totally loving my Ninja Foodi – thanks for posting!
Oh it is quite amazing! I think I fall more in love with it every week! Can’t wait to hear how it turned out.
It was amazing!! My whole family love it. My boyfriend got me the ninja foodie for my birthday and I’ve been cooking like crazy.
YAY! It’s the best right?!
I haven’t even opened the last crisp lid but the smell is is wonderful. Here I go….
YAY! Let us know how it turns out. I think I need to add this to my menu this week too! It’s so comforting.
Made this in my Ninja Foodi halved the recipe worked great made a pan out of aluminum foil and sat on rack in low position pc then hit broil for 7 minutes will make it again
Awesome! And gotta love the getting creative with the foil 🙂
Best meatloaf recipe!!!!!! thank you!! I used 1lb ground beef and 1lb pork sausage, then improvised chex mix for my bread crumbs. Holly cow you should try it with chex mix. INCREDIBLE! Will be making again, also glazed with sweet baby rays before air crisping.
Yum! Love Sweet Baby Rays!
I halved the recipe because there’s just two of us. I turned out really well. Nice to be able to make meatloaf in the summer and not have to use the oven.